Aller au contenu principal

Install Streamlit App on ubuntu

· 5 minutes de lecture

Nginx, HTTPS, SSL

Requirements:

  • Server with Ubuntu
  • Python
  • Git

Install Project

Clone your project

git clone url_project

Create Python Env

python3 -m venv venv

Active Env

source venv/bin/activate

Install libs

pip install -r requirements.txt

Launch Streamlit

streamlit run app.py

Install Nginx

Installation

sudo apt update
sudo apt install nginx

Commands Nginx

sudo systemctl stop nginx
sudo systemctl start nginx
sudo systemctl restart nginx
sudo systemctl reload nginx
sudo systemctl disable nginx
sudo systemctl enable nginx

Adjusting Firewall

List the application configurations that ufw knows

sudo ufw app list
Output
Available applications:
Nginx Full
Nginx HTTP
Nginx HTTPS
OpenSSH

Allow traffic on port 80

sudo ufw allow 'Nginx HTTP'

Check Status

sudo ufw status
Output
Status: active

To Action From
-- ------ ----
OpenSSH ALLOW Anywhere
Nginx HTTP ALLOW Anywhere
OpenSSH (v6) ALLOW Anywhere (v6)
Nginx HTTP (v6) ALLOW Anywhere (v6)

Verify Web Server

Check status

systemctl status nginx
Output
● nginx.service - A high performance web server and a reverse proxy server
Loaded: loaded (/lib/systemd/system/nginx.service; enabled; vendor preset: enabled)
Active:active (running) since Fri 2022-03-01 16:08:19 UTC; 3 days ago
Docs: man:nginx(8)
Main PID: 2369 (nginx)
Tasks: 2 (limit: 1153)
Memory: 3.5M
CGroup: /system.slice/nginx.service
├─2369 nginx: master process /usr/sbin/nginx -g daemon on; master_process on;
└─2380 nginx: worker process

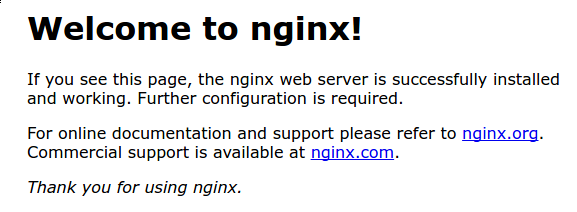
Enter it into your browser’s address bar:

http://your_server_ip

default_page.png


Setting Up Server Blocks

Create the directory for your_domain as follows, using the -p flag to create any necessary parent directories:

sudo mkdir -p /var/www/**your_domain**/html

Assign ownership of the directory with the $USER environment variable:

sudo chown -R $USER:$USER /var/www/**your_domain**/html

To ensure that your permissions are correct and allow the owner to read, write, and execute the files while granting only read and execute permissions to groups and others

sudo chmod -R 755 /var/www/**your_domain**

Create a server block with the correct directives. Instead of modifying the default configuration file directly,

let’s make a new one at /etc/nginx/sites-available/your_domain:

sudo nano /etc/nginx/sites-available/**your_domain**

Paste in the following configuration block

server {
listen 80;
listen [::]:80;

server_name **your_domain**;

location / {
proxy_pass http://0.0.0.0:8501;
proxy_http_version 1.1;
proxy_set_header X-Forwarded-For $proxy_add_x_forwarded_for;
proxy_set_header Host $host;
proxy_set_header Upgrade $http_upgrade;
proxy_set_header Connection "upgrade";
proxy_read_timeout 86400;
}
}

Next, let’s enable the file by creating a link from it to the sites-enabled directory, which Nginx reads from during startup:

sudo ln -s /etc/nginx/sites-available/**your_domain** /etc/nginx/sites-enabled/

Test to make sure that there are no syntax errors in any of your Nginx files:

sudo nginx -t

Restart Nginx

sudo systemctl restart nginx

You can test this by navigating to http://your_domain


Allowing HTTPS Firewall

Allow the Nginx Full profile and delete the redundant Nginx HTTP profile allowance:

sudo ufw allow 'Nginx Full'
sudo ufw delete allow 'Nginx HTTP'

Your status should now look like this:

sudo ufw status
Output
Status: active

To Action From
-- ------ ----
OpenSSH ALLOW Anywhere
Nginx Full ALLOW Anywhere
OpenSSH (v6) ALLOW Anywhere (v6)
Nginx Full (v6) ALLOW Anywhere (v6)

Obtaining SSL Certificates

Install certbot

sudo apt install certbot python3-certbot-nginx

Create Certificates

sudo certbot --nginx -d **your_domain** -d www.**your_domain**
Output
IMPORTANT NOTES:
- Congratulations! Your certificate and chain have been saved at:
/etc/letsencrypt/live/example.com/fullchain.pem
Your key file has been saved at:
/etc/letsencrypt/live/example.com/privkey.pem
Your cert will expire on 2020-08-18. To obtain a new or tweaked
version of this certificate in the future, simply run certbot again
with the "certonly" option. To non-interactively renew *all* of
your certificates, run "certbot renew"
- If you like Certbot, please consider supporting our work by:

Donating to ISRG / Let's Encrypt: https://letsencrypt.org/donate
Donating to EFF: https://eff.org/donate-le

Your domain's config file (created earlier) must have been modified automatically.


Update Nginx Configuration

Open the configuration file for your domain

sudo cat /etc/nginx/sites-available/**your_domain**

Verify if the file has been modified

If not, replace with the following:

server {

server_name **your_domain** www.**your_domain**;

location / {
proxy_pass http://0.0.0.0:8501;
proxy_http_version 1.1;
proxy_set_header X-Forwarded-For $proxy_add_x_forwarded_for;
proxy_set_header Host $host;
proxy_set_header Upgrade $http_upgrade;
proxy_set_header Connection "upgrade";
proxy_read_timeout 86400;
}

listen [::]:443 ssl ipv6only=on; # managed by Certbot
listen 443 ssl; # managed by Certbot
ssl_certificate /etc/letsencrypt/live/**your_domain**/fullchain.pem; # managed by Certbot
ssl_certificate_key /etc/letsencrypt/live/**your_domain**/privkey.pem; # managed by Certbot
include /etc/letsencrypt/options-ssl-nginx.conf; # managed by Certbot
ssl_dhparam /etc/letsencrypt/ssl-dhparams.pem; # managed by Certbot

}
server {
if ($host = www.**your_domain**) {
return 301 https://$host$request_uri;
} # managed by Certbot

if ($host = **your_domain**) {
return 301 https://$host$request_uri;
} # managed by Certbot

listen 80;
listen [::]:80;

server_name **your_domain** www.**your_domain**;
return 404; # managed by Certbot
}

server {
listen 80;
listen [::]:80;

server_name **your_domain www.your_domain**;

return 301 https://$http_host$request_uri;
}

Reload Nginx

sudo rm /etc/nginx/sites-enabled/**your_domain**
sudo ln -s /etc/nginx/sites-available/**your_domain** /etc/nginx/sites-enabled/
sudo nginx -t
sudo systemctl reload nginx

You can test this by navigating to https://your_domain